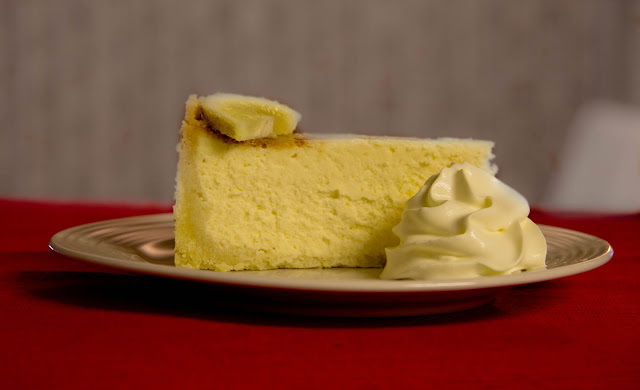
So after watching re-run of Friends, there was an episode where Rachel and Chandler kept eating this baked cheesecake. It was so good they were willing to eat it off the floor after dropping it. Oh it gave me a craving! I LOVE cheesecake. The dense, creamy, rich slice of goodness! Admittedly, cheesecake does take a little bit of effort to make. Obvious by how much I was talking about it at work the whole week – a lot. Sorry guys. It is also a more expensive cake to make, considering the ingredients used and the amount of time required to cook it. So fair warning, this isn’t a ‘quick and simple’ recipe.
The base in this recipe I adapted from Donna Hay’s version from Masterchef Australia 2011. For those of you who know me, I’m not really a Masterchef fan. Don’t ask, I just think there are more negatives than positives about that show that I choose not to watch it. Saying that, Mum was watching a particular episode and asked me to get the recipe from the web. Reading the base’s ingredients, it definitely perked my interest. Especially not having to crush my own biscuits – a big plus. The portions below is enough to have the base go up the side of the cake.
Because I like dense cheesecakes, I opted for a different filling recipe. The one I always use is from taste.com.au. I’ve reviewed many cheesecake recipes, but I always come back to this one. You’ll probably fall off your chair when you see how much cream cheese goes into it, its about 50% more than other recipes. But it really makes it that much more dense and creamier!
I’ve also researched a bunch of tips and tricks to get the perfect cheesecake. So follow the link and check it out before embarking on this cheesecake journey. Also I strongly suggest you use a proper cake mixer (Kenwood or Kitchen Aid). It just makes life a lot easier and is definitely worth the investment as its a lot easier to make other things too, including bread and pizza. You can find second hand ones/refurbished ones on eBay that are still in great working condition. They last a lifetime!
Ingredients
Base
1 1/2 cups almond flour/meal
1 1/8 cup plain flour
1/3 cup caster sugar
135g butter, chilled and chopped
Filling
750g cream cheese, at room temperature (3 packets)
1 cup caster sugar (I cut it down to 3/4 cup)
2 tspn finely grated lemon rind (grated skin of 1 lemon)
1/2 tspn vanilla essence
2 tblspn plain flour
4 eggs
300ml sour cream
Method
Base
1. Preheat oven to 160C. Grease base and sides and line the base only (don't line the sides, the base won't stick to paper) of a 20cm spring form tin with baking paper. Cover the exterior of the tin with foil.
2. Place almond meal, flour, sugar and butter into a bowl. Rub mixture with your fingertips. You can also use a cake mixer with the dough hook attachment. The mixture will form coarse breadcrumbs (see picture below). You know this mixture is ready when you squeeze a handful in your palm and it stays that shape.
3. Place the base mixture in the tin and press gently with fingers to line the tin until even and then smooth out with the back of the spoon. I suggest doing the sides first before you press down the base. Bake for about 15 minutes or until light golden. Remove from oven and set aside.
~ You can keep the oven on if you work fast enough to get the filling ready. Otherwise, I suggest turning it off to save power. But remember to turn it back on and preheat to 160C before returning the cake to the oven.
Filling
4. Using electric cake mixer, beat cream cheese until a smooth consistency. Mix in sugar, vanilla and lemon rind until just combined. Beat in flour. Add the eggs, one at a time, beat well after each addition until combined. Stir in sour cream until just combined. Be sure not to over mix, as this will force more air into the mixture.
5. Pour cream cheese mixture into the base. Tap lightly to get rid of any bubbles.
6. Place tin in a baking tray lined with a tea towel. Fill tray with boiling water until it comes midway up the tin. Place in oven and bake for 1 to 1 1/2 hours or until just set in the centre. If you notice the top browning or cracking, the heat is too high, turn down the heat.
7. Leave the cake in the oven, turn the oven off and leave the oven door a jar for a couple of hours or until cooled completely (this also prevents the cake from cracking). Take cake out of oven and baking tray, remove foil and place in fridge for about 6 hours or overnight to chill.
8. Top with fruit (optional), cut into wedges to serve. Keeps in fridge for a few days (if it lasts that long!)


2 comments
this cake sounds so good, I'm going to make it asap
ReplyDeleteThanks Kim!
This was ssssooo yummy! much better than store bought ones!
ReplyDelete